Autoload into IPRO Eclipse - Processing Job
You can load eCapture Processing Job data directly into an Eclipse database.
Ensure that the Eclipse server Information was configured. Overview: Enterprise Integration.
|
|
Important: An existing Eclipse case must exist to use this option. It does not, then create an Eclipse case. Ensure the Eclipse server is running. For more information, see Configure Integration with Other Enterprise Applications. |
-
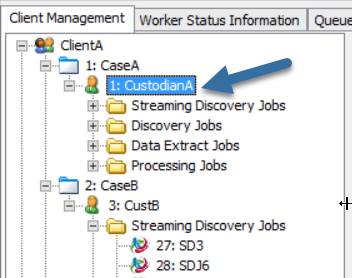
Click the Client Management tab.
-
Do one of the following:
-
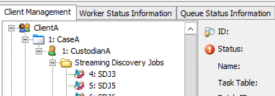
In the Tree View, under the Custodian:
- Navigate to Processing Jobs.
-
Right-click a completed Processing Job, and select Export Processed Data on the context menu.
-
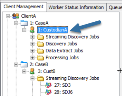
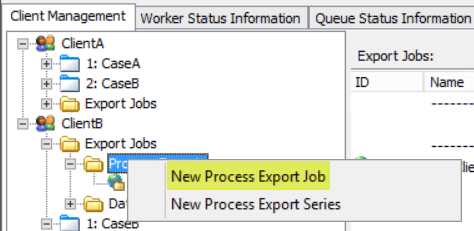
In the Tree View, under the Client:
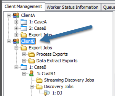
- Navigate to Export Jobs.
-
Right-click Process Exports and select New Process Export Job on the context menu.

The Specify Export Parameters dialog box appears. The selected Job is already selected in the Tree View. Select additional options, as outlined in the remaining steps of the procedure.
The Specify Export Parameters dialog box appears.
-
-
In the Specify Export Parameters dialog box, do one of the following under Select Jobs to Export:
If you want to select jobs to export:
-
Choose Select Jobs to display the list of Jobs available for export.
-
Expand the Tree View and select one or more Jobs for exporting. The Export Job Name field populates with the first Processing Job you selected. You can select multiple Processing Jobs for export. The system goes through each one and stores the data under the directory of the Export Job Name you indicated in the Specify Export Parameters dialog box. It may be necessary to expand the Tree View to see the Processing Jobs.

-
Choose Select Export Set to display a list of export sets that were created in QC.
- Expand the Tree View and select one export set for export. If necessary, expand any Export Set Containers to select an export set that is stored in a container.
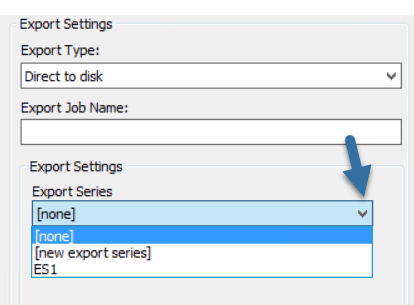
- Under Export Settings, on the Export Type drop-down menu, select Direct to Eclipse.
-
Under Export Settings, in the Export Job Name field, enter an Export Job name. If a default name displays in the field, modify it as necessary. This is the name the system uses as the directory name where the exported data is stored.
-
(Optional) Under Export Settings, open the Export Series drop down menu and do one of the following on the menu:

-
Leave the default setting ([none]).
-
Select an Export Series. See Overview: Export Series for background information about Export Series. Or see Create an Export Series if you want to create the Export Series before the Export Job is created.
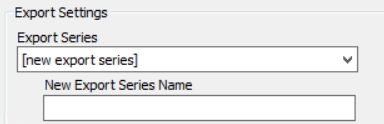
- Select [new export series] and enter a New Export Series Name.

Note: When an existing Export Series is selected, the
 button appears. If you click the button, the Export settings dialog boxes do not appear; instead the Job is placed in the Job Queue. If you do not click, the Export settings wizard displays allowing you to set the Export settings and then run the Export Job.
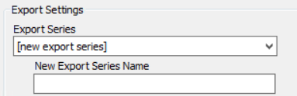
-
-
(Optional) Click the Load from Template browse button, and navigate to the ExportSettings.INI template file that has the processing export settings from a previously run data extraction export. A file will not exist until you run your first processing export.

Note: This option is not available if you selected an Export Series on the drop-down menu. The ExportSettings.INI file saves time by not requiring you to manually make selections in some of the Export wizard screens, The file also ensures that there is consistency when exporting Jobs for a particular situation.
-
Select a Task Table on the drop-down menu. The task table that displays in the field is based on the last task table selected for the Client.

-
Click OK.
Note: A warning dialog box may display if one or more of the selected Processing Jobs have not yet passed QC. You can elect to continue to export or cancel, QC the jobs, and then export again.
The Eclipse Case Selection dialog box appears.

-
Select a Case that is to receive the eCapture data. To quickly locate the Case in the list, enter the first alphanumeric character of the Case name in the Case Search field to advance to Cases beginning with that character. Additional characters may be typed in the field to narrow down the possibilities if several Cases contain the same initial characters. The Clients, and the Cases (Projects) within the Client, are alphabetized.
-
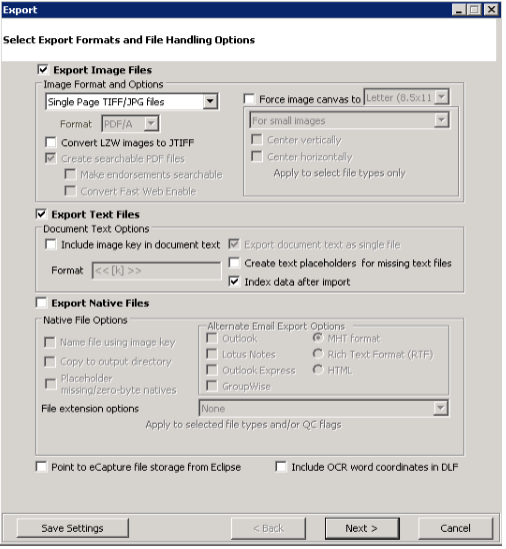
The Select Export Formats and File Handling Options dialog box appears. Complete this dialog box by selecting the required options.

For more information about the various options, click the following.
-
If you select Point to eCapture file storage from Eclipse, the text/native files will remain in the eCapture system directory. Eclipse will access the files from this location. Use this option to have Eclipse use existing data that is stored in eCapture directories when no changes are being made to the output files for review.
-
Select the Include OCR word coordinates in DLF check box, located at the bottom of the the Select Export Formats and File Handling Options dialog box, to generate a load file with word coordinates to allow for highlighted search hits in Eclipse. Selecting this option will increase the amount of time it takes to build the load file. This is recommended only for image-only review databases. Native file reviews can leverage built-in word highlighting when viewing the document’s text or rendered native file.
-
Click
 to display the Specify Merge Data Options dialog box.
Click the following for information about completing this step.
When finished, click
. -
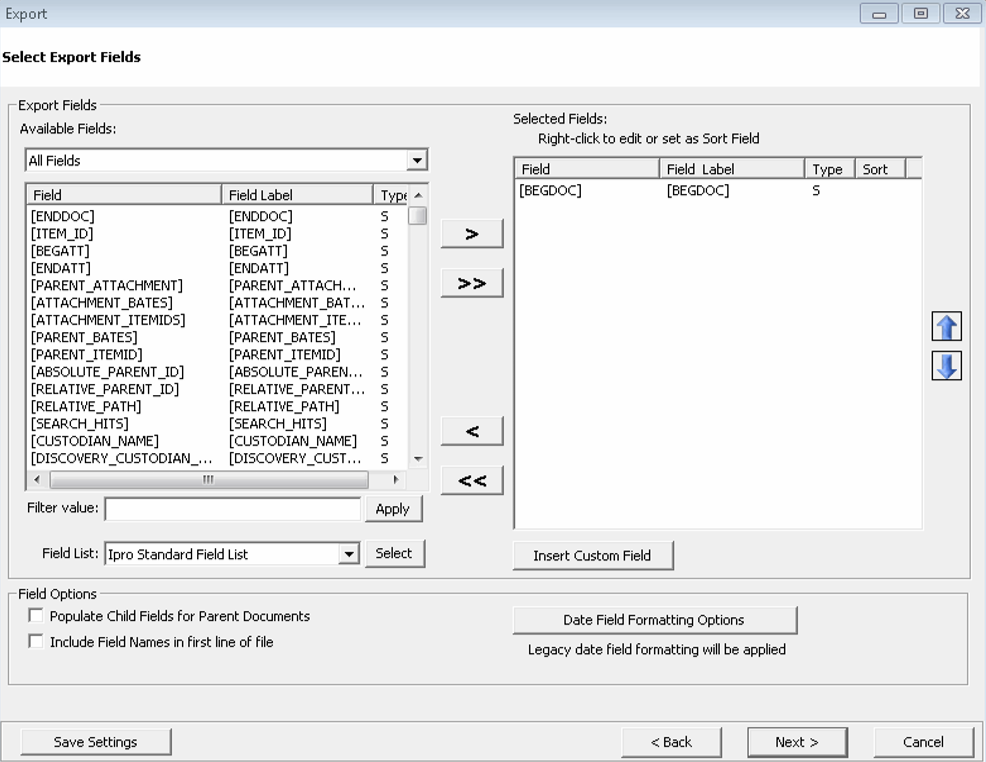
The Select Export Fields dialog box appears.

Click the following for more information about this step:
 Define Export Fields for Databases
-
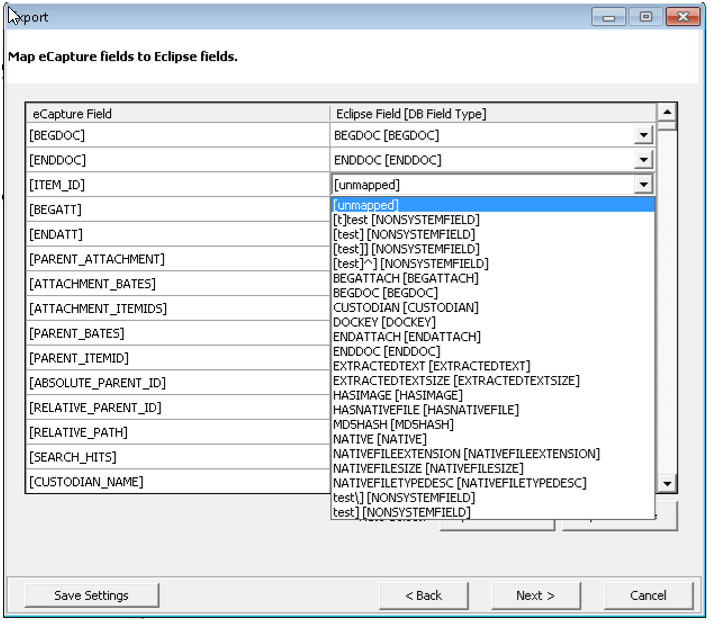
Click
to
display the Map eCapture Fields to EclipseFields dialog box. Click eCapture to Eclipse Fields below for information on populating
this dialog box.

Click the following for information about populating this dialog box.
-
Click
. The Specify
Endorsements dialog box appears. 
Click the following for information about populating this dialog box.
-
When finished, click
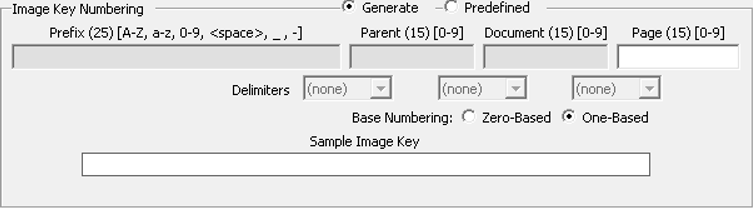
. The Specify export directory and file options dialog box appears.
This is the final screen in the Export process. 
Click the following for more information about completing this step.
- Click
 to conclude the
autoloading into Eclipse. The Job displays in the Job Queue and the
Progress column shows Autoload Initiated. Under
Process Exports in the Client Management Tree View, the Job also displays with the Eclipse icon .
to conclude the
autoloading into Eclipse. The Job displays in the Job Queue and the
Progress column shows Autoload Initiated. Under
Process Exports in the Client Management Tree View, the Job also displays with the Eclipse icon .


If you want to select Export Sets to export:


![]() Export Formats and File Handling Options
Export Formats and File Handling Options


 to display
the File Browser dialog box. Browse to a location, enter a file name,
and click Open. The Save Template As dialog box displays and indicates
the path name in the Location field. Click Save.
to display
the File Browser dialog box. Browse to a location, enter a file name,
and click Open. The Save Template As dialog box displays and indicates
the path name in the Location field. Click Save.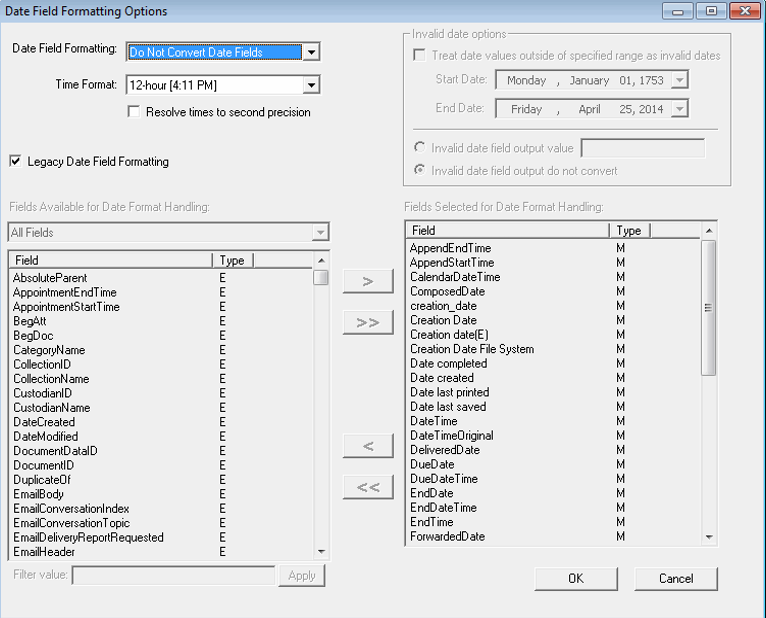
 to map
  to map
  to save the Export
settings to an INI file, which may be imported for a future export.
In the Save Batch Export Settings dialog box, navigate to a different
directory if necessary, and enter a file name. The default extension is
.INI. Click Save.
to save the Export
settings to an INI file, which may be imported for a future export.
In the Save Batch Export Settings dialog box, navigate to a different
directory if necessary, and enter a file name. The default extension is
.INI. Click Save.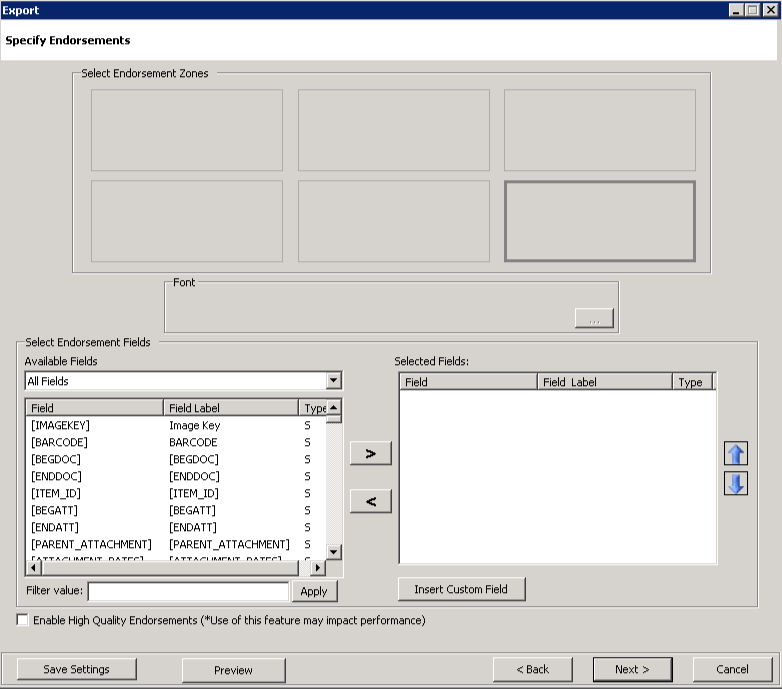
 . To display all fields, delete the value in the Filter Value field
and click
. To display all fields, delete the value in the Filter Value field
and click  to move the field to the Selected Fields list box and place it in
the selected Endorsement Zone at the same time. Once a field has
been selected for placement in a zone, it cannot display in a different
zone. A total of three fields may occupy a single zone. If a zone
is to contain more than one field, use the
to move the field to the Selected Fields list box and place it in
the selected Endorsement Zone at the same time. Once a field has
been selected for placement in a zone, it cannot display in a different
zone. A total of three fields may occupy a single zone. If a zone
is to contain more than one field, use the  or
or  to change the order
of the fields in the Selected Fields list box in the active Endorsement
Zone. Each field displays on its own line in the Endorsement Zone.
to change the order
of the fields in the Selected Fields list box in the active Endorsement
Zone. Each field displays on its own line in the Endorsement Zone. .
. to open the
Font dialog box. Select a Font, Font Style, Size, Effects (Strikeout,
Underline), and Color. Click OK to close the Font dialog box. Repeat
to change the appearance of additional Endorsement Zone fields.
to open the
Font dialog box. Select a Font, Font Style, Size, Effects (Strikeout,
Underline), and Color. Click OK to close the Font dialog box. Repeat
to change the appearance of additional Endorsement Zone fields. .
.
 . The Endorsement Sample Data
dialog box displays showing the Zone, Type, Field Label and Field Value,
if any, in a grid format. To preview a sample of the Endorsement Zones
and fields on an image, click .
. The Endorsement Sample Data
dialog box displays showing the Zone, Type, Field Label and Field Value,
if any, in a grid format. To preview a sample of the Endorsement Zones
and fields on an image, click . The Endorsement
Sample Image Preview dialog box displays and shows the selected fields in their Endorsement Zones. Use the first three icons in the toolbar to adjust
how the image displays for viewing: Fit Normal, Fit Horizontally, and Best
Fit. The magnifying glass icons are used to Zoom In and Zoom Out respectively.
The Percentage values in the drop-down menu can also be used to Zoom In or
Zoom Out. The Sample can be saved if required.
The Endorsement
Sample Image Preview dialog box displays and shows the selected fields in their Endorsement Zones. Use the first three icons in the toolbar to adjust
how the image displays for viewing: Fit Normal, Fit Horizontally, and Best
Fit. The magnifying glass icons are used to Zoom In and Zoom Out respectively.
The Percentage values in the drop-down menu can also be used to Zoom In or
Zoom Out. The Sample can be saved if required.

Related Topics